The first step was to start drilling holes in the side panels 4 inches apart on the edge that will connect with the bottom panel. I immediately ran into a quandary. Should I drill the holes in the side panels and then try to place it into position and then mark the corresponding holes on the bottom panel? Or should I mark them on the bottom panel every 4 inches, starting from the bow, the same as I did for the side panel? The first would give more accurate placement, the latter would be easier to do by myself. I started with the latter approach. It meant accurate measurement and placement of holes on both panels. With a concave edge on the side panel it also meant using a tape measure that could flex with the edge. After I marked the side panel, I began marking the bottom panel. That's when I realized that the length of the bottom panel edge didn't match the length of the mating side panel edge. The bottom panel was a little longer. Hmmm. So I thought of and used a third option: I marked the side panel, held the side panel up to the bottom panel flat, starting at the bow, and then "rolled" the side panel along the bottom panel edge, marking the hole positions on the bottom panel. I first shifted the side panel to split the difference between the lengths of the panels. I did this for both the first and second side panel, then began wiring them.
Ready to start wiring:

As I started wiring I found the flaw in my measuring and drilling approach: because of the rabbet in the side panel, and the bend of the side panel as it is attached, the holes no longer lined up. The good news is that they seemed to have balanced out. The mismatch at the bow pulled in one direction, while the mismatch at the stern pulled in the opposite direction. I could adjust the fore/aft position of the side panel with no problem. So, full steam ahead.
First port panel wired on (note bottle of resin used to force some rocker into the bottom panel):

First starboard panel wired on:

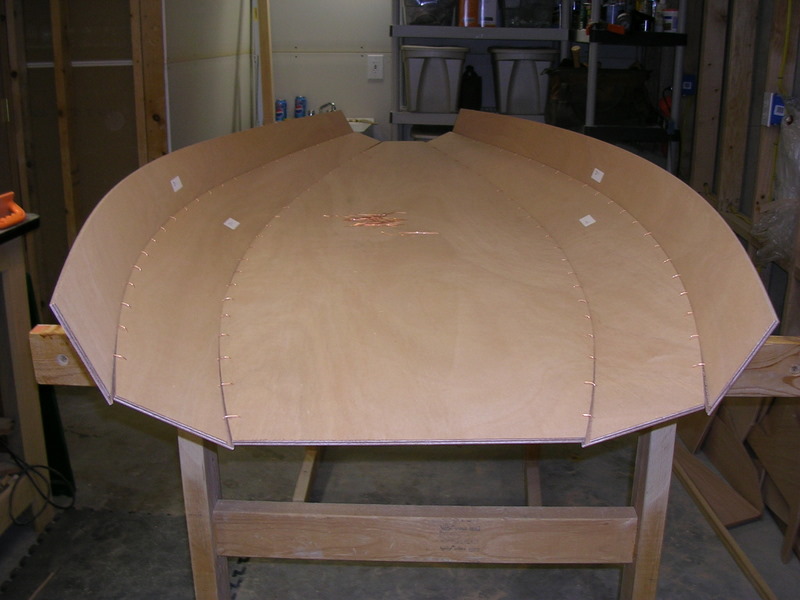
Second port panel on:

Second starboard panel on:
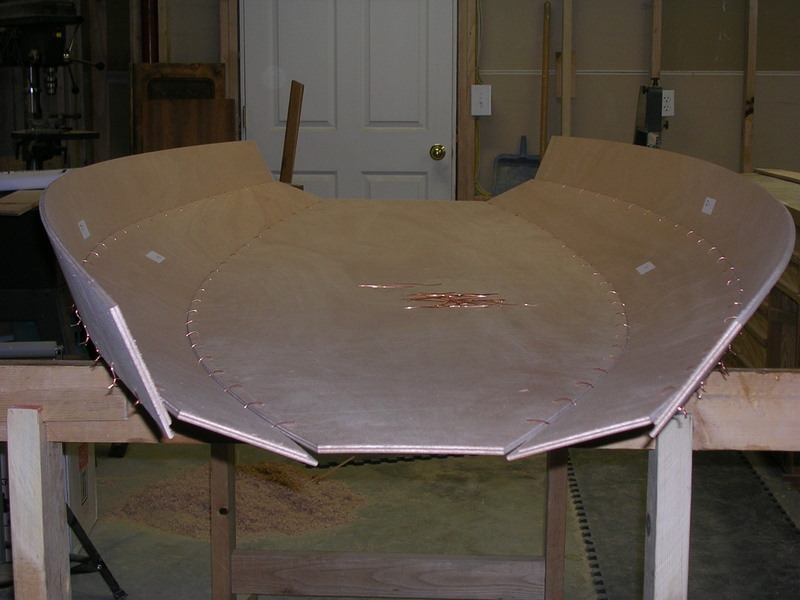
 One thing that I noticed is that I couldn't get the close the gaps at the ends of the panels with just "finger tight" twisting on the copper wires. I assume this will take care of itself when I wire on the transoms. Forcing more rocker by spreading my sawhorses farther apart and adding more weight to the bottom panel may also help.
Here's a shot showing the gaps at the bow:
 At this point, I turned my attention to the transoms. I predrilled them 1/2 inch from the edges so I can wire them to the bottom and side panels. I hope 1/2 inch is correct, since the manual doesn't actually say what the correct distance is. I also sanded their edges since one side of each was pretty splintered by the CNC machine at the factory.
That's all for now. Next up: wiring the transoms.

No comments:
Post a Comment