Saturday, December 30, 2006

Glue recovery

Today, I pulled the wire stitches out and scraped away the high spots on the glue lines.

Pulling the stitches went a lot better than I was expecting. Since the epoxy was touching over half of the stitches, I assumed it was going to be difficult to pull them. So I clipped all of the wires from the inside and got a heat gun ready to go. It turned out to be a non-issue. They all came out without needing any heat to soften the epoxy. I only had to tug hard on less than ten of them.

With the wires out, the next step was to remove the high spots from the uneven epoxy glue lines. My plan is to remove the high spots and then fair the "chines" with thickened epoxy (thickened with wood flour). This will hopefully result in a flat bevel between the panels. So how to remove the high spots? I started with a paint scraper, which worked, but was hard going. It also tended to scratch the wood more than I liked. Then I discovered that a metal file worked great. I hope the epoxy is cured enough to prevent sensitization issues since I got flakes of it all over myself. Another thing I did, which I should have done with the first epoxy debacle, was to add masking tape above and below where I want my bevels to go.


So, at this point, I should be ready for fairing. Wish me luck!

Thursday, December 28, 2006

Glue, Glue Glorious Glue!

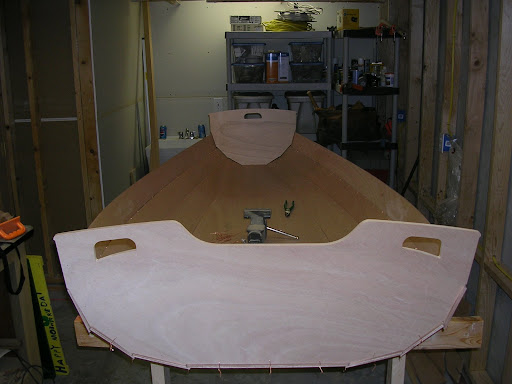
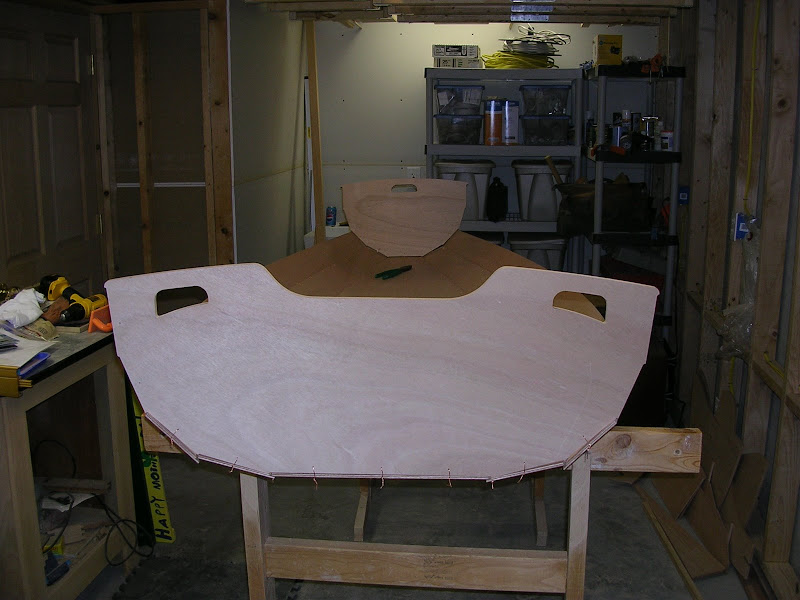
Do I have a boat or a pile of scrap wood in the shape of a boat?

That was what I was asking myself after I was finished gluing the panels together.

It started out OK. I got everything in order. I bought some extra syringes to practise with. I bought laquer thinner and denatured alcohol have on hand. I donned a respirator mask and nitrile gloves. I changed gloves whenever I noticed any epoxy on them at all. This way I didn't smear the glue all over my shop, my tools and the boat.

Step one: Practise. I screwed the pumps into the bottles of epoxy resin and hardener. I primed them and tossed out the first squirt that came out of each, since these weren't metered. Next I added two pumps of each into a disposable plastic bowl. I mixed well then added four spoonfuls of thickener (silica). I was shooting for the thickness of "thin mustard." What exactly is that? I played with it a bit and tried using it with a syringe on some scrap wood.

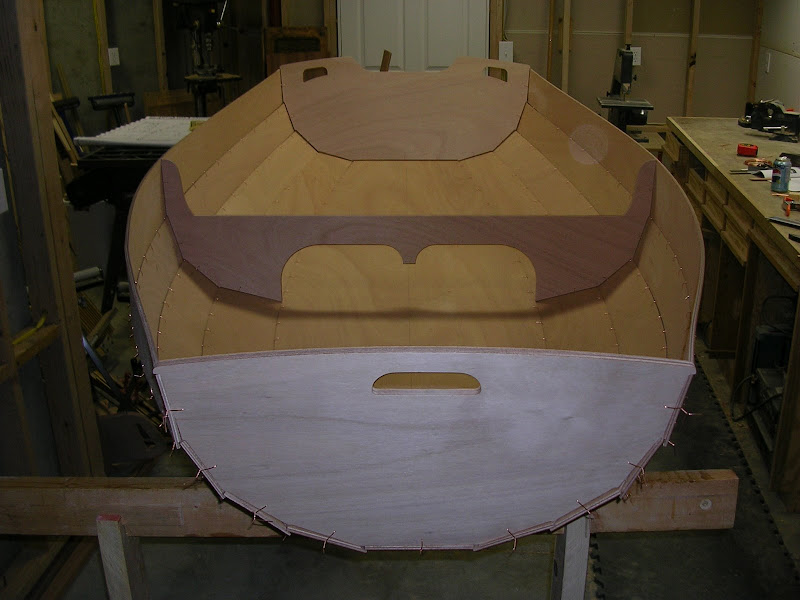
Step two: Add masking tape to the inside seams at the bow and stern to try to contain any drips.

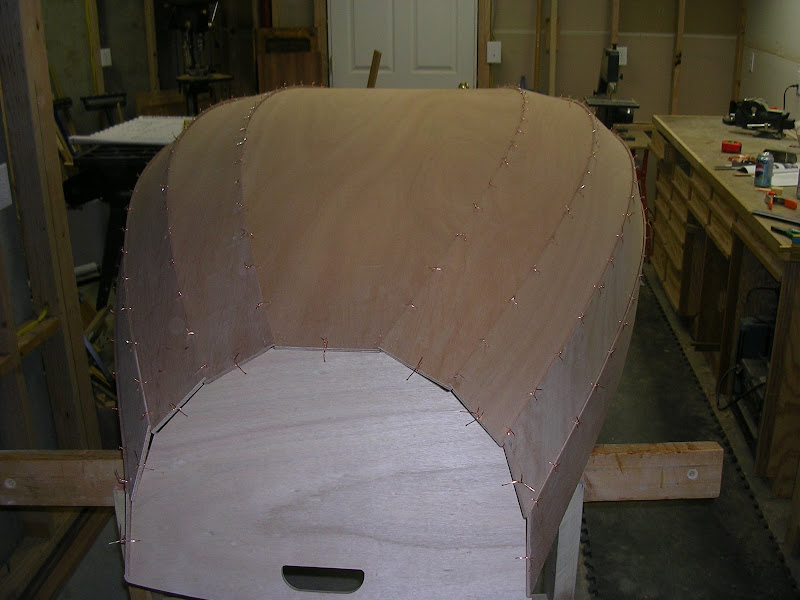
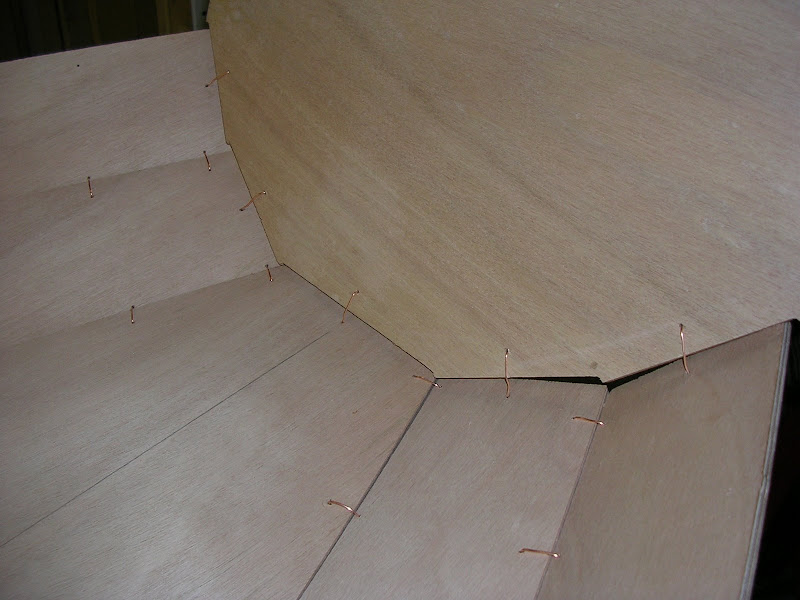
Step three: Start gluing for real. This step should have been "Think", but I was nervous enough about this whole gluing thing that I was worried if I stopped to think, I wouldn't start again. So I mixed up another batch. Two pumps apiece. Five spoonfuls of silica. Mix well. Is it thick enough? Load it into a syringe. Close eyes. No, wait, better leave them open. Start injecting the thickened epoxy into the "lapstitch" joints. It was hard to apply it evenly so it had a consistant level, but it seemed to be working. I checked underneath - no drips. After mixing and using another batch, and gluing up four joints, I took a half-day break.

When I returned this morning, my previous work had set. I still don't know how long it will take to cure. I made two more batches and glued up the last four joints. I had half of a batch left. With this I went over yesterday's work and added glue to places I had obviously missed or where I hadn't added enough glue.


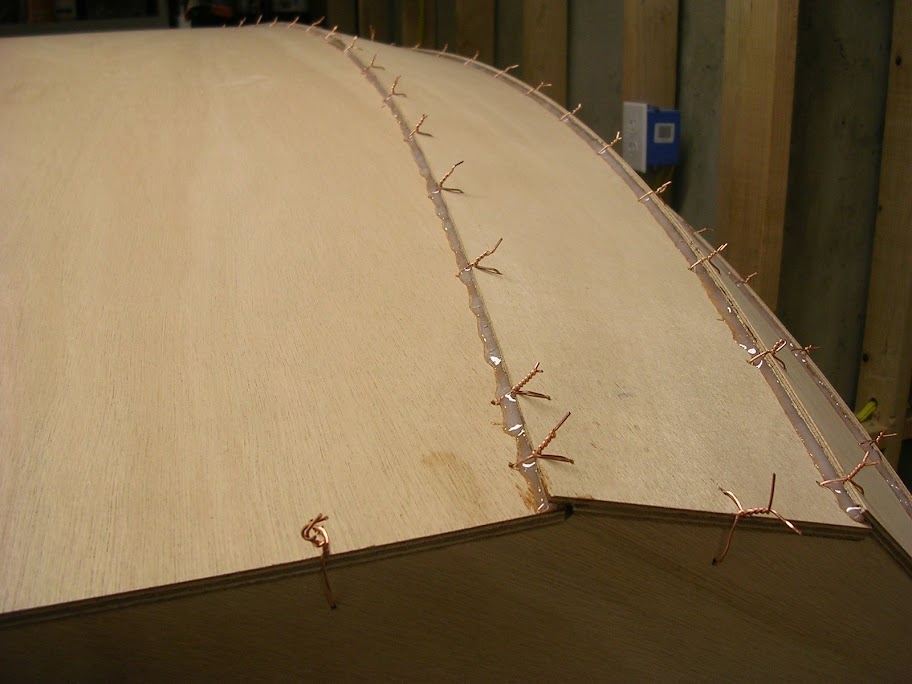
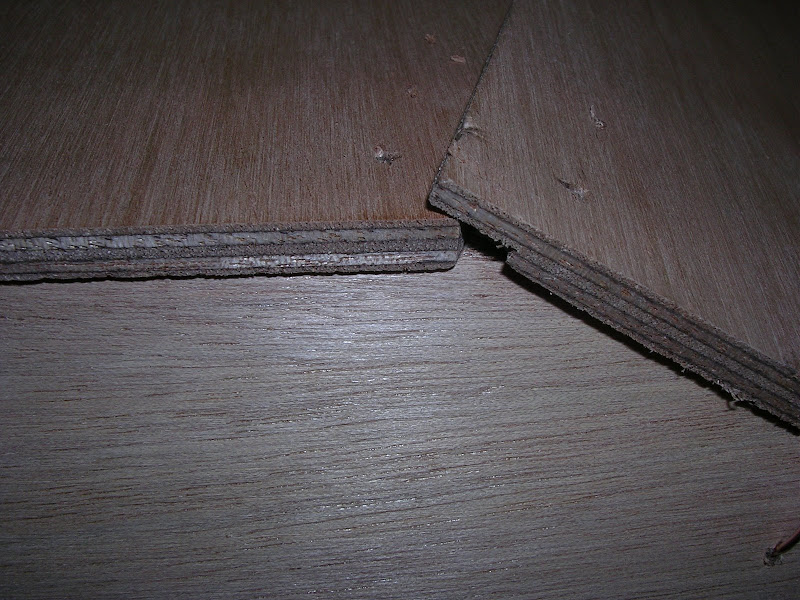
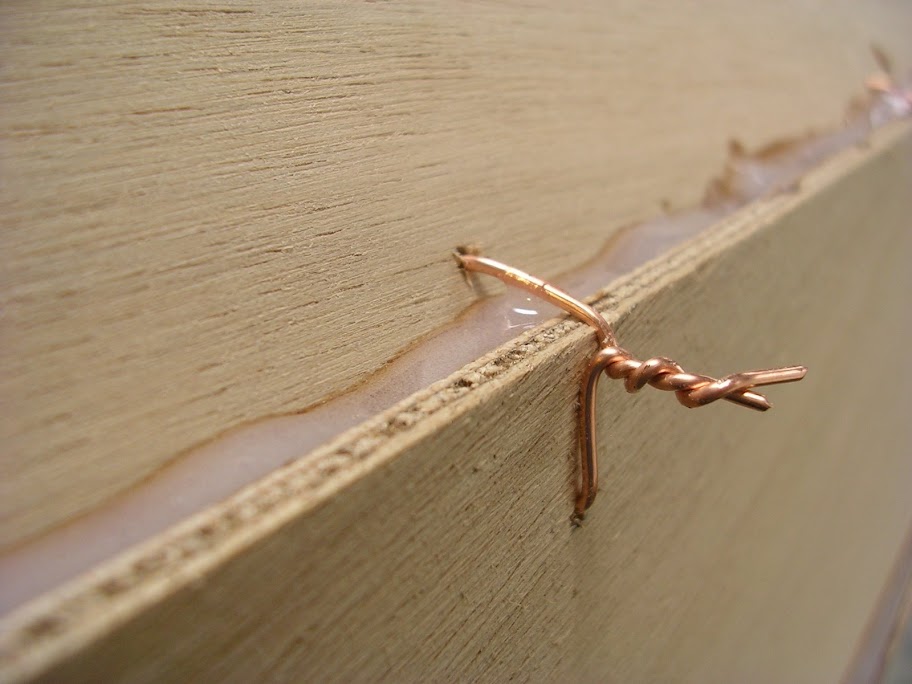
I saw three things that concerned me. First, the glue was adhering to the wires. It was supposed to flow underneath them without touching them, but at least half of my wires were attached to the glue in the joint beneath them. Second, the joints I had done yesterday were "lumpy". They evened out somewhat but were definitely uneven. Third, at the ends I could see that the epoxy hadn't completely filled the joint at the bottom. The area to be filled looks like a triangle in cross-section. They glue hadn't filled the very bottom of the triangle.


Looking back (I always do my best thinking in hindsight), I now realize that I added too much thickener to my epoxy. I guess I had "mayonaise" and not "thin mustard". Thinner epoxy would have filled in the joint more completely and "self-leveled" better.

What to do? I could only think of one thing to do. Panic.

So I began to panic, convinced that my boat was completely ruined. I was worried about the cosmetic damage of the lumpy seams, but I was even more concerned that the joints were too glue-starved and that I had done structural damage.

My wife calmed me down and suggested I call CLC for advice. So I gave them a call. They are really going to regret providing me with free technical support by the time this boat is done. I describe my woes to one person, who thinks the boat is still OK, but he has me talk with someone who I think was John. He assures me that it isn't ruined. I will have to sand out the high spots in the seams, but he says I would have had to fill in the low spots with epoxy thickened with wood flour anyway. As far as structural issues, he didn't think I had any, but if I wanted, I could try injecting unthinned epoxy from the inside once the boat was flipped back upright. Good thing I still have a syringe left over.

Bottom line: I think I still have a boat and not a pile of scrap wood and epoxy.

All Systems Go!

I took some pictures of the gaps. On Christmas, I emailed one of them (shown below) to clcboats.com and asked for advice. Was this gap too big?


I got an answer from John by noon on the next day. This gap was normal! Time to get ready to glue!

I then closed up the gaps between sides and transoms. This went well and I was able to close up the gaps almost entirely. There were still some gaps, so I drilled a two more pairs of holes per transom and added more wire ties. This closed it up completely. I also made sure the transoms were flush with the ends of the bottom panel and top side panels.

Next, I leveled my sawhorses. I then moved the upside-down boat around until it overhung the sawhorses by the same amount port and starboard. This assured that the sawhorses were more-or-less square to the centerline of the boat. I placed a level on the top of the bottom panel, square to the centerline, in several places along the length of the boat. If it wasn't level, I pushed down on the high side and tightened the wires if needed. In addition, from underneath, I looked for light shining through any gaps in the panels. I tighted the wires where I saw light. After about an hour, I had the wires tightened up and the boat square.

Last Side Panels and Bulkhead

I added the fourth and last set of side panels:


Now it was time to temporarily add the middle bulkhead. Prior to wiring on the third and fourth sets of side panels, I drew a centerline on the bottom panel. I had then measured the distance from the stern transom to the middle bulkhead along the bottom panel on the plans. I multiplied this distance by a factor of four (the plan scale) and marked that position on the centerline. Using a carpenters square, I drew a line perpendicular to the centerline where the bulkhead should go.

After all of the panels were on, I placed the middle bulkhead in position over the line I had marked earlier. I positioned the top of the bulkhead to match the measurement given in the plans (from the bow transom). I also used a combo square to make sure the bulkhead was perpendicular to the shear line. I used a couple of clamps to hold the bulkhead in position. In order to get the bulkhead to fit, I had to tighten up the wires on the first set of side panels to close the gap between it and the bottom panel. I had to adjust the other panels somewhat and slide the bulkhead from side to side until it was in a decent position. There is still a gap between it and the side panels, but it's pretty small (1/16") and I figure it will get covered up when the bulkhead is glued and filleted in later. I wired the bulkhead in place and removed the clamps.

Now it was time to flip the boat over. My wife helped my with this.


At this point, I got a good look at the gaps between the panels, and the gaps between the panels and transoms. These gaps had returned after I added the third and fourth side panels. I removed the extra sets of stitches I had added the ends of the side and bottom panels since they were starting to tear the wood and they didn't seem to be helping. I was still pretty worried about these, especially the 3/16" gap between the first side panel and the bottom panel at the bow. More on this later.

Third side panels

(I'm in "catch-up" mode now, this and next few posts cover work that I did from last week to today).

I added the third (next to last) set of side panels. Only one more set to go.


Prior to doing this, I attempted to close up the gaps between panels that were at the bow and stern. These gaps were only a couple of inches long, but they concerned me. I tried my technique of using band clamps to tighten up the ends of the boat. This allowed me to tighten up the gaps substantially, but not remove them completely.

Wednesday, December 06, 2006

I managed to get a little work done on the Pram this last weekend. I stitched on the bow and stern transoms:


After I began attaching the stern transom, I saw that it was not going to help close up the gaps between the sides and the bottom as I had hoped (I'm not as worried about the gaps between the sides and the transoms).

I broke about half of the wire stitches in the transom trying to close the gaps. I felt I had to do something about the gaps between the sides and the bottom before I continued. It seemed like it was just going to get harder to fix it as I added additional side planks. I added an additional set of stitches between the sides and bottom, close to the stern and bow. These helped, but trying to tighten those stitches enough to close the gap fully resulted in breaking the wire. I now realize that the wire is good for holding the pieces in position, but I can't reliably tighten very much by just twisting the wires more. I had to get the wood close to its proper position before even beginning to twist the wire.

Pulling across the boat with both hands, I could just manage to get a gap to close. But then I had no way of twisting the wire stitch. So I called my son down to help me. With his aid, I reduced the gaps, both at bow and stern. I couldn't close them up all the way however, and I'm still worried about it:


One idea I have is to use a strap clamp around the end of the boat, with the sides held the proper distance apart with a piece of scrap wood cut to fit. Tightening the strap would then push up on the bottom forcing the gaps to close. I don't think it would hurt to try, anyway.