Monday, January 29, 2007

Final transom and bottom fillets

After almost two weeks, it was time to get back to the boat.

Yesterday:

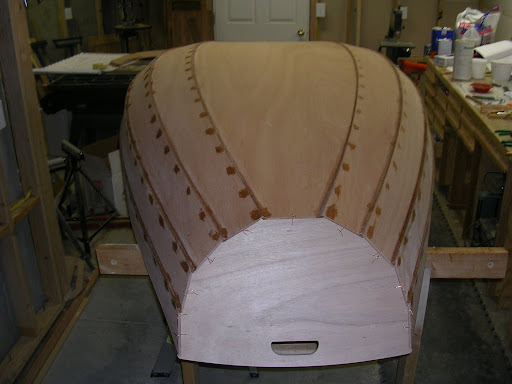
After the transom tabs dried, I pulled the wires holding the transom on. Amazingly, the tabs actually worked and the transoms didn't fall off!

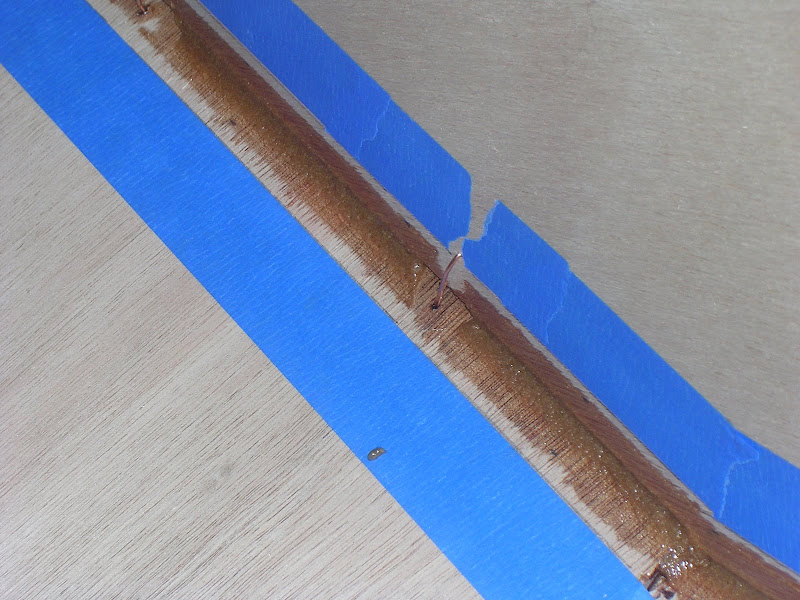
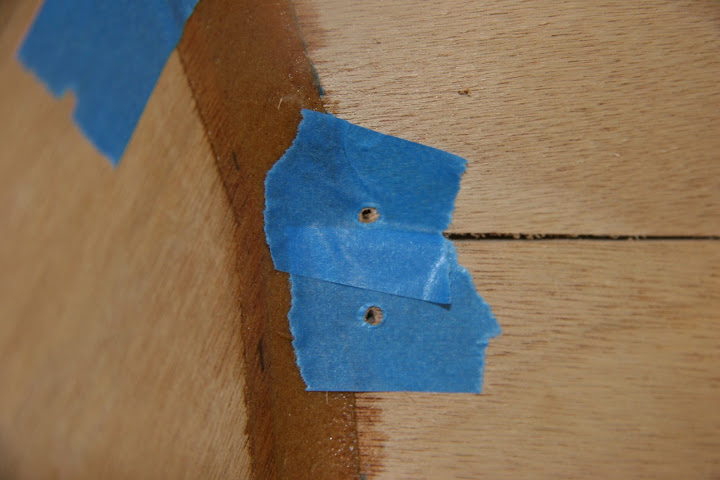
Since I wanted to fill the wire holes on the inside before I fiberglassed the bottom (especially the wire holes on the bottom), I began prepping for that in addition to getting ready for the final transom fillets. I stole a trick from "Kayaks You Can Build: An Illustrated Guide to Plywood Construction" by Ted Moores and Greg Rossel, and drilled a bunch of 1/8" holes in a roll of masking tape. I then tore off pieces of the tape and placed the piece over a wire hole to be filled, centering the 1/8" hole in the tape over the 1/16" wire hole. This was in hope of reducing the amount of sanding needed. I wish I had done that with the outside holes.


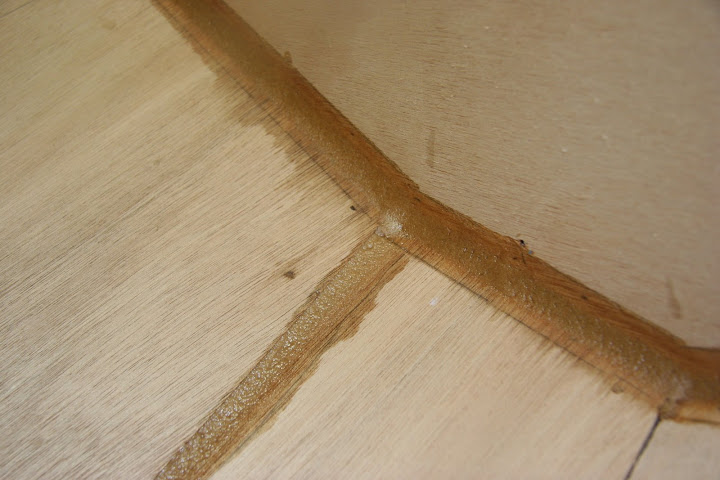
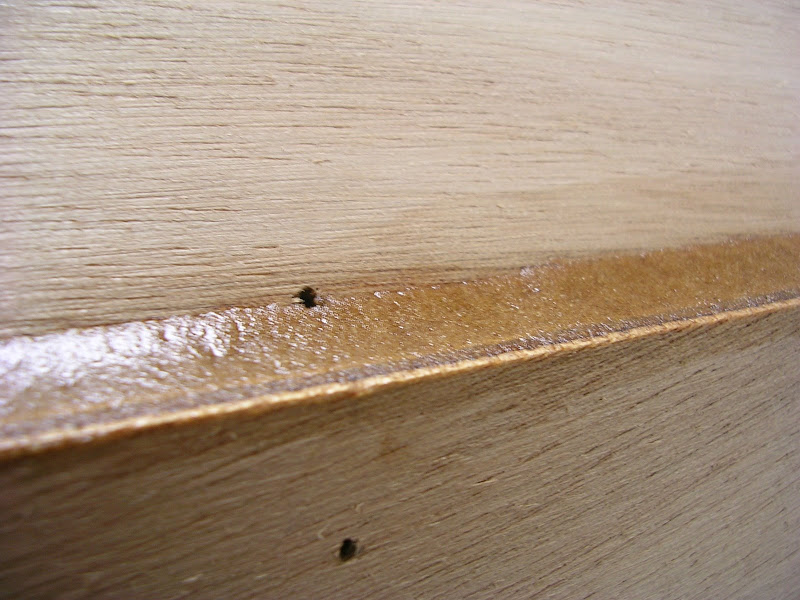
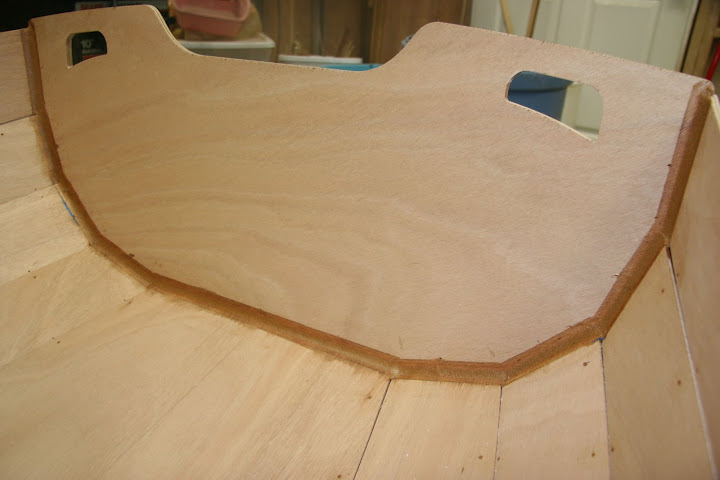
Next step was to lightly sand the tabs and wipe the area down with alcohol. Then it was time to add the final fillets to the transoms. I mixed up a batch of epoxy thickened to "peanut butter" consistancy - 3 pumps of goo, 8 spoonfuls of wood flour, 2 spoonfuls of silica and 1 spoonful of microlight. I loaded it into a freezer ziploc back (outside out this time!) and clipped off a corner. I squeezed out a line of the epoxy putty along the transom joints. I took a plastic putty knife that I cut down to a width of 1" (with a 1/2" radius curve) and spread the putty along the joint. This was much easier than adding the tabs because the wires were gone. Once I was happy with the fillets, I turned my attention to the wire holes. I squirted a dab of putty using the the ziploc back onto each of the masked wire holes. I took a gelato spoon and forced the putty into the holes and scraped away the excess epoxy putty. By this time, the epoxy was starting to set and I was racing against time to get all of the holes finished before it was too late. I managed to do it.

The second to final act for the night was to pull all of the tape. The tape along the fillets didn't take very long, although I had some trouble with it since I had taped it before adding the tabs and the epoxy from the tabbing had glued the tape down.

Pulling the tape off of the wire holes took nearly forever. This was because I was doing it with gloves on and I had trouble getting the tape up and when I did I had trouble getting the tape off my gloves and into the trash can. Plus there were about a million holes. Or so it seemed.

On the other hand, the trick worked great:


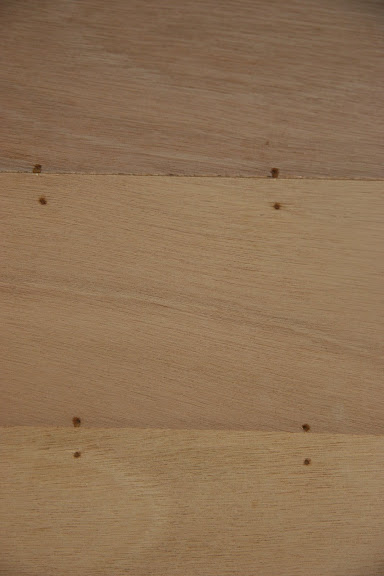
The final task for the night was to run my gloved finger, wetted with alcohol, along the tabs to smooth them out. I also pressed down on each of the wire holes for good measure.

Today:

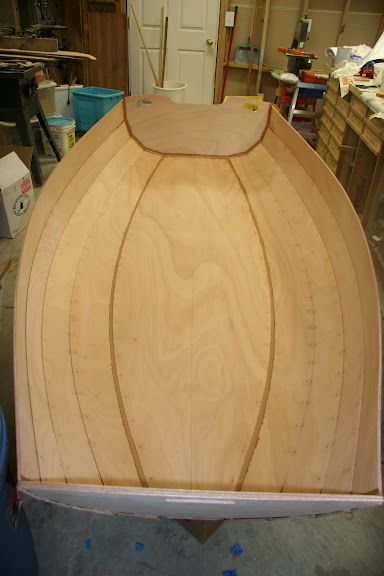
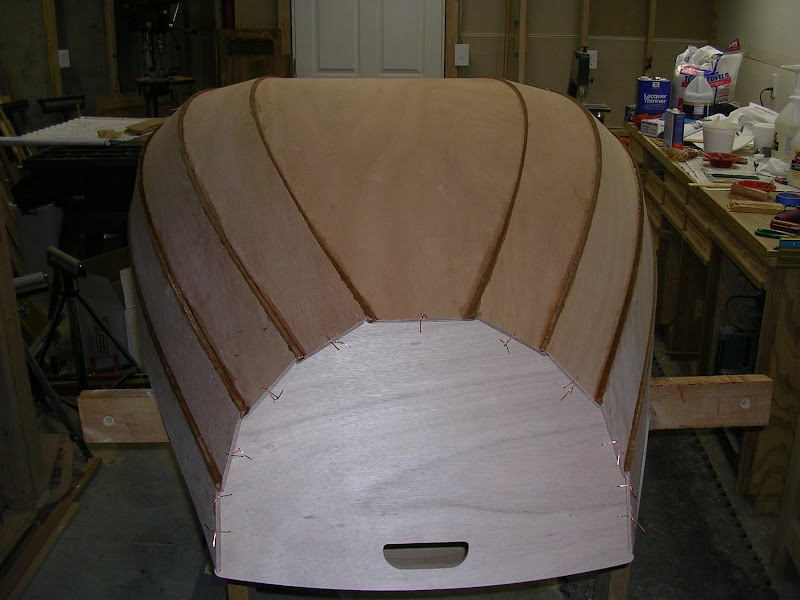
Time for the bottom fillets. I prepared a 2" wide plastic putty knife by cutting a 1" radius curve on the end of it. I placed this curve on the bottom-to-first-side-panel joint and marked where the knife touched the first side-panel along both of the joints. I then masked both sides of where the fillet would go. I also masked the gap between the 3rd and 4th panels at the stern. And for the fun of it, I masked the wire holes in the transom and the last few panel holes that had been masked when doing the transom fillets. I cleaned the intended location of the bottom fillets with alcohol and then wet it down with unthickened epoxy.


I mixed up another batch of "peanut butter" epoxy. I thought that the exising fillets were a little too dark compared to plain epoxy on the okume so I modified the recipe a little: 3 pumps of epoxy, 8 spoonfuls of wood flour, 2 spoonfuls of silica and 2 spoonfuls of microlight. I should have known better not to experiment with such a visible fillet, but since when have I thought before I've acted? This putty was much smoother than the previous batch. It was definitely lighter.

Same drill: load it into a ziploc bag, clip the corner, extrude the putty along the fillet joints, and smooth out with the rounded putty knife. I filled the wire holes and the gaps between the side panels at the stern. Lastly, I pulled the tape, which went much faster than the night before.

I have to say it looks pretty good. Except for the color. Hmmm. Definitely lighter than the okume. Rats. Now that I look closely at it, the transom fillets aren't really darker than the okume, just a different shade of brown. The extra spoon of microlight in my latest batch of epoxy made it too tan. Oh well, it still looks good.

Monday, January 15, 2007

Tabbing

The next step was to "tab" the transoms to the rest of the hull. The instructions do not call for this, they just call for fillets to be added between the transoms and hull. The instructions don't talk about what to do with the wire stitches holding the transoms in place. The CLC website suggests that the wires merely be pushed down and the fillet added on top of them. The wires on the outside would then be cut flush to the wood. I didn't want to do this for two reasons. First, because of where I drilled the holes for the stitches, I wouldn't be able to make a smooth fillet over the wires. Second, I didn't like the idea of bits of metal showing on the outside of the transoms, which I'm planning on finishing bright.

So what I'm going to do is to tab the transoms in between the wires. A tab is basically a "mini-fillet" that will be covered by the "real" fillet later. Once the tabs are dry, the wires can be removed and final fillets added.

Step one was to flip the boat over. My sawhorses were too tall to allow working on the inside of the boat comfortably, so I set it on a couple of cardboard moving boxes. There was still a small gap between the bow transom and hull, so I tightened up the wires a bit.

Step two was to add masking tape prior to adding the tabs. This was to make clean up easier. I've realized that an hour of taping before gluing is much better than a couple of hours of sanding after gluing. My final fillets will be smoothed with a one inch wide stick with a half-inch radius semi-circle cut and sanded on the tip. So I marked a line 1/2 of an inch from the seam on both sides. My tab will be smoothed with a 3/4 inch stick, so I marked another line 3/8 of inch on both sides of the seam. I layed masking tape down on the 1/2 inch lines and then another line of masking tape down on the 3/8 inch lines. At this point, I was ready for epoxy.


Step three was adding the tabs. First, I mixed up a two-pump batch of epoxy. Before I added any fillers to this batch, I applied the clear epoxy to where I was going to add the tabs with an acid brush. I then added my fillers to the remainder of the epoxy. I used 5 spoonfuls of wood flour and 2 spoonfuls of silica and no microlight. I was going for "strong" rather than "sandable" for the tab-fillet. I loaded this mess into a ziploc freezer bag. To do this I placed the bag in a big cup I had and folded the top of the bag over the sides of the cup. This made it easy to pour the epoxy mixture into the bag with little mess. Unfortunately, for some reason, I turned the bag inside out before I placed it inside the cup! I didn't realize my mistake until I had added the epoxy. Oh well, it still worked, even if I couldn't actually close the bag up. I clipped off a corner of the bag and then proceeded to lay down a line of the goop along the seam between the wire stitches. Once it was all down, I used my 3/4 inch wide stick to smooth it out and form a nice concave fillet. After all of the tabs were smoothed, I pulled the tape on the 3/8 inch lines.


I'm glad I added these tabs for one additional reason: It was a test run of the adding the real fillets. It's very likely that the final fillet will cover any mistakes I made with the tabs. As it turned out, the epoxy mixture for the tabs wasn't thick enough to be easily smoothed with the stick. I will add more wood flour and microlight for the final fillets.

Sunday, January 07, 2007

Filling Holes

For my next step, I decided to fill the wire holes on the outside prior to flipping the boat back over. I used this as an opportunity to experiment with the fillet mixture. I had asked for advice on the CLC web forum. The consensus seemed to be 90% wood flour, 10% silica. My latest mixture was 2 pumps of resin and hardener, 5 spoonfuls of wood flour, 1 spoonful of silica and 1 spoonful of West microlight. The texture was a little smoother than pure wood flour, but still not what I'd call silky smooth. The color, however, seems to be a pretty good match for epoxy coated okume. I'll wait for it to dry before comparing and taking photos.

For filling the holes, I used a sample spoon a local gelato shop gives out. It was basically a minature teaspoon. I was the perfect shape and size to fill the holes. For scraping the excess epoxy away I used another gelato spoon, this one had a flat front, like a coal shovel. I was able to scrape around the holes pretty well. Hopefully, it won't require much sanding.


I had a little time left over, so I glued together two plywood pieces to form the laminated skeg. I mixed up some unthinned epoxy and coated the surfaces to be glued. I then added silica until it was "mustard" consistancy. I added the thickened goop to one side and clamped them together on top of my newpaper covered workbench. What a mess! I need to get some polyethylene plastic film before I do any more of this.

Tuesday, January 02, 2007

Fairing the bevels

OK, I think I managed to recover from my panel-gluing debacle yesterday by fairing them to a consistant level.


I mixed up glue and thickened it to "peanut-butter" consistancy (3 shots of resin and hardener and 8-9 heaping spoonfuls of wood flour). I put this into a ziploc freezer bag and clipped off a bottom corner. I squeezed a line of the thickened epoxy out onto the existing glue line. I then used a putty knive to smooth out the bevels. It took about 2 hours and 2 batches of epoxy to do all eight glue lines. It went much better than I expected (I now have very low expectations when working with a seemingly irreversible step like epoxy). I also used a trick from the instruction manual: about 3 hours after I finished with the first set of four glue lines I wet my glove with denatured alcohol and smoothed the newly-faired bevels. This worked well, and even better on the epoxy that had only 2 hours of cure time.


So, over all, I'm happy with the result. I'm not super thrilled with the consistancy of wood flour thickened epoxy. The denatured alcohol trick helps, but it still has rough texture that will require sanding. I would prefer a thickening agent that doesn't result in such a difficult texture. I hear microlight works well for fairing, but I don't know if it will be strong enough for the non-taped fillets that need to be added (transoms, bulkheads and seats). I don't know if microlight is weaker than wood flour or not. The West System has a "filleting" mix that sounds promising, but if it is going to be difficult to sand then I'm not so sure. I'm going out today to buy some of these thickeners and do some tests.

I've also been thinking about when and how to fill in the holes where the wires went. The instruction manual doesn't talk about this, although it has a photo of it at the prep point for the finish (varnish and/or paint). It seems to me any holes under fiberglass need to be done before the fiberglass goes on. Since fiberglass goes on after the transom and bottom get their fillets, this is sooner rather than later. Filling holes isn't a structural issue, so using microlight might be the best answer.